Wednesday, May 16, 2012

This Is Gonna Be Good...

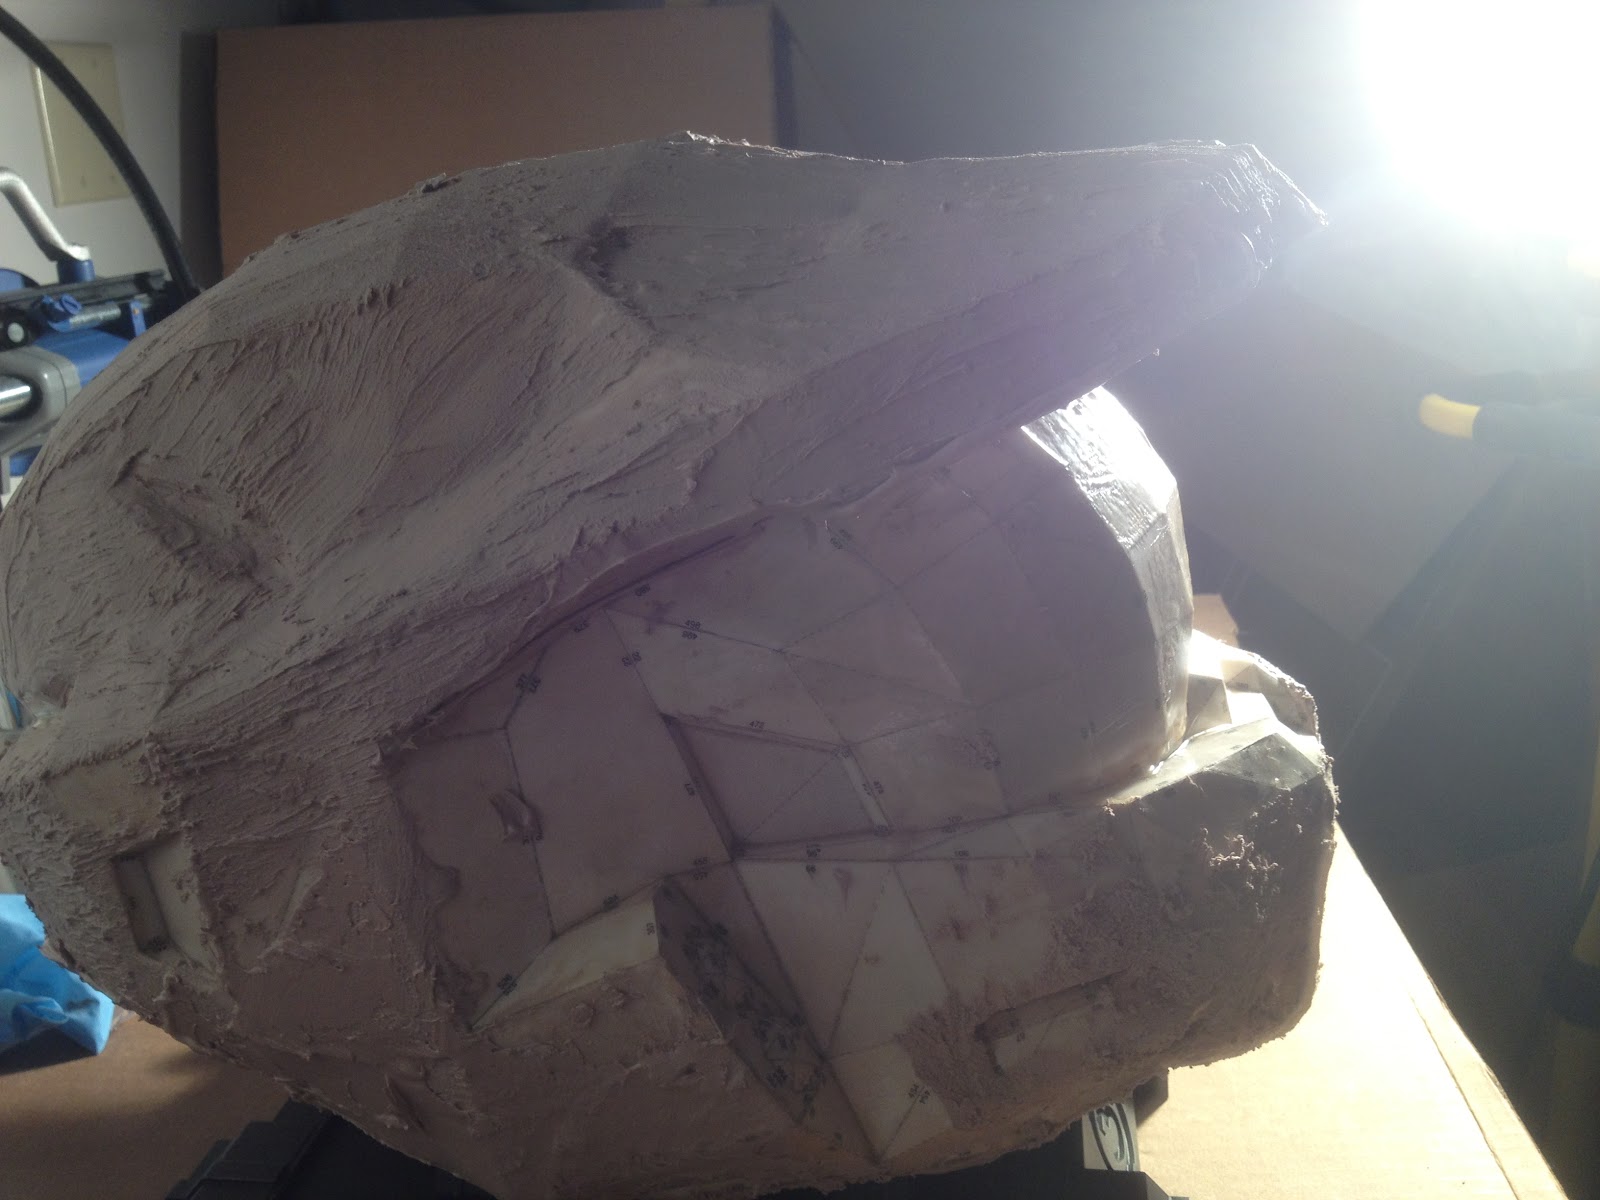
All-in-all, I would say the weekend was a success. I didn't get as much done as I wanted to, but I did get done about what I expected to. There were four pieces I worked on this weekend, the first and main one of course being the helmet. Second I wanted to get some work on the chest and back. and then if I had time I wanted to get after a bi/tri/shoulder and a thigh. The helmet was coming along, but it still had some nasty cracks and nicks in it that were driving me bonkers. I did some reading online and found this amazing stuff called "Bondo Spot Putty". I have been using Bondo's body filler and resin for a while now, but never heard of the spot putty. Simply put, the spot putty works like Bondo, only it comes pre-mixed in a tube and is a gift from the gods... I had been trying to get info on using it over the primer because once the surface is primed and all the same color it is SO much easier to see the imperfections. So once I got that stuff the helmet came together much nicer.
It also looks pretty badass in that nice dark red color... after it dried I did a little light sanding and re-primed.

There are still a few minor spots that could use a fix up, but definitely looks 1000% better than before.

That was all Friday night, of which my good buddy James came over to once again assist me in my venture. after a quick lesson on Bondo application, he was off to work on the chest.

I didn't tell him until later that he would have been shot if he damaged it... you know, don't want an employee with bad work moral or anything ;)
After a couple hours of Bondo'ing, and a lot of talking, he left me with this.
I was really excited to see how good it looked. The front of the chest was a bit caved in on the left breast plate, and he got a good amount of even level out of it. From that point, we called it a night... and went inside and played Halo Reach for several hours...

Monday, I got back to it. I started back in on the torso in hopes of getting it done. I am sure that being an amateur I don't have all the proper tools and know how when it comes to Bondo and sanding (or at least I pray there is a better way out there) because about 7 hours of work later it looked like this:

and at that point my back was killing me! I also discovered that there are some downsides to working outside.

1) The sun is hot.
2) Hot sun equals hot driveway.
3) Bondo sets MUCH faster in the heat.
I might as well be holding a handful of quarters! (okay, so maybe its not that much... but I'm cheap!) However, I adapted to my surroundings (move into the shaded garage) and pressed on! I picked back up on Tuesday due to some other chores and things I needed to do around the house since I was off and all.

After a lot of Bondo and sanding and Bondo and sanding and Bondo and... where was I? Oh yeah, sanding! I got a good layer across the whole area.
There was another area that was caved in on the outside of the right shoulder blade. I slathered that up pretty good with Bond and did a little shaping and carving. Here it is before I sanded it down.
I also had to pour some more Rondo into the piece because as I was sanding I ran across a few week points in the front of the chest and one or two in the back. After that, I decided to go ahead and see out we looked in primer. 

I knew it wouldn't be perfect, but like I said earlier I can now see all the impurities in it and know where to use the spot putty at.

Throughout the day as I was waiting on things to dry, or realized I made too much Bondo, I worked on the Bi/Tri/Shoulder and the Right Thigh pieces. The arm piece is pretty straight forward, just some Bondo work:
The thigh however was a bit more involved. The edge was very thin, so I used a technique I have seen online (thanks Thorsson) where you use duct-tape to line the edge and do a roto pour so as to thicken up an edge.
I then realized that when I made these I didn't give them a good test on their size and as it turns out, now that they are hardened and more stable, I did and they are a tad bit too long! Oh the horror!!!! I tried not to panic, and instead got out the ol' Dremmel tool. I cut off about 1/3-1/2 an inch on the back of the knee because the problem I had was that I couldn't bend my knee enough to sit or squat... and as we all know, Master Chief has to be able to squat over his victims...
 I did do a little sanding to round it off, but didn't take an after shot.
I might trim a hair off the top of the front as well for a good hip crease, otherwise I think it will work great!

Finally, I was done for the day. Like I said, I do wish I had gotten more done, but for me, this was a lot of work to get done all at once and I am thankful I was able to get the time to do so! Here are some final shots of everything I worked on.


And here's a nice group shot to finish it off:
If you would like to see more come together and happen a lot faster (and you know you would) send me money! =P


Wednesday, May 9, 2012

Nothing to See Here...

Well, unfortunately I have been at a stand still once again as far as production and headway on the suit go. I am however taking some time off this weekend and plan to get a heavy amount of work done, so that will be good. My buddy James is also planning to come and help (at least on Friday) to work and get things moving along. I am still not satisfied with the helmet... I dont know if I am being too picky or if I am right/realistic in wanting perfection out of it. so I will probably work a bit more on it this weekend as well. I am starting to do the chest piece to get it all Bondo'd up and start the sanding process on it too. once I get it done we will start cutting! (Yikes!) So hopefully all goes well!

Friday, April 27, 2012

The Blacker, The Better

I FINALLY got some more work done tonight... I am a little behind on my whole "one piece every two weeks", but hopefully I can catch up by doubling up on the smaller pieces. Tonight I added a layer of fiberglass resin to my uncoated forearm piece, but more importantly, I got a lot of Bondo and sanding done and (while there are still a few areas that aren't perfect...) most of it is looking really good!

Here are a couple shots on it's stand:
You can see the little marks on the side that look like maybe fingerprints or something. That's one of the little imperfections where I sanded down to the paper... :( having a rough time getting that to smooth out...
And here's a couple of vanity shots:
 It still stunk a bit... but I did JUST prime it...
 Stupid splotches again.
 Top shot. Left side of the top (right side of the picture) in the front, I guess you would say the visor, there are a few nicks I need to get out.
and of course I had to wear my Reach shirt while taking the monumental photos! ;)

Also, I spent about 30 minutes trying to figure out the lights in the helmet. I had an old cheep LED flashlight, so I tore it up and tried to wire it to see if it would work. I got it to work surprisingly!... for about 2 seconds. I think I fried the lights because, and I am just guessing, I fried the bulbs by using a 9V...? I don't know what I am doing when when it comes to electricity, so if anyone has any input on a good light source for the head lamps then please let me know!

Tuesday, March 27, 2012

There's a Hole in My Helmet!... Five Actually

Well, I finally sucked it up over the weekend and decided to get to cutting! I was really nervous all throughout because I knew if I were to cut incorrectly I would be screwed and I have put a lot of work into this so far. I hate that I am unable to show action shots or anything throughout the process. Its just too difficult to hold the camera with one hand and take pics while doing everything else with only the other hand. All that being said, here is where I got to

I had some old foam laying around that I picked up from work (we were going to through it away and I knew I could find a use for it) so I put it inside the helmet for a little temporary padding.
And then, I put it on
Now if only I had money to buy some paint and primer =P oh well, first of the month is almost here!

Friday, March 23, 2012

Mix, spread, sand, repeat...


Stayed up late last night working on the helmet and shin, and just hanging out in the garage after everyone else was asleep anyway. I spoke with my neighbor across the street about some tips on how to properly go about the Bondo’ing process and he gave me some good pointers:

-Don’t make a lot at a time (You would think that would be obvious...)
-Apply only what you need (Minimal amounts) so you don’t have to sand as much
-If you have little holes or gaps, take a rubber spatula or a credit card with a little give and press a little more Bondo into it

(Thanks Dan!) 

After that he offered me his belt sander and a couple of other tools, but I’ll see if I end up needing them or not. The Dremel it pretty cool for sanding down thick areas in little patches, but to go over the whole thing was a pain. Obviously using less Bondo the first time around would have saved be a lot of sanding =P

Here are some updated shots of the helmet!
And I also started Rondo’ing my left shin piece. Unfortunately there is a spot in the bad that popped out when I wasn’t looking so it is a little uneven. Not a real big deal, but I will have to do a little artistic carving back there to fix it.
All in all a good night of work. I will probably sand down the helmet tonight and get on what should hopefully be the last round of Bondo!

Monday, March 19, 2012

Better Hop To It!

Well, I decided that I had better get a move on since I have only 2 weeks (apparently) to finish my helmet! I got out the Bondo and started pasting on a layer so that I can sand it down once it dries. Hopefully tomorrow... I didn't quite get the entire thing covered in a layer and I unfortunately wasted some because I made too big of a batch, but I got most of it covered and I think it is gonna look really good once it is sanded down!
I also busted out my Halo3 collectors helmet holder (I had to make it a little taller) and used it to hold the helmet up.

Let Me Check My Schedule...

So I was talking to a coworker today who asked me how the suit was going and I told him it was coming along well. He asked me if I would have it done in time for Halloween and I said "Oh yeah, totally!"... I got to thinking, I have no piece completely finished. So I need a game plan, a schedule, something to stick to better than this whole "eh, I'll get around to it and it will all work out" attitude. so, from today I have 225 days to get this thing done. I would like to have some time to get it done comfortably before "Haloween" (get it, Halo-ween...) so we will say I have 210 days from today. There are also 15 pieces to this suit. that means that I have roughly 14 days, or two weeks, per piece to finish 100% done... guess what I'm doing tonight...